Before digging deep, let’s do an overview of this category. Fat skis are divided in two general types relative to their shape. Taking wideness as a reference, we find three: Low-fat, Mid-fat and Fat skis. Focusing on discipline, we find those dedicated to the Freeride without compromise and those which combine Freestyle tricks, which need powder flotation and a raised tip in their tails for backwards landings.
The evolution seen in this kind of skis during this first decade of the century can be described as meteoric in many aspects. It all started a bit slowly, but in recent years not only there have been profound changes related to the shape and size, but they’ve also been a resounding success and a great contribution to the ski industry.
The Rossignol Bandit, a classic from the first years.
© Skis Rossignol SAS
In the first years of their production, there were just a few fat skis going beyond the 100mm wide waist. Lots of efforts and development have been invested in this category from the manufacturers themselves to the pro-athletes as well. Nowadays, the spectrum found in this specific field is quite wide. The irruption of the Rocker has widened even more the imaginary borders. However, manufacturers have applied this new concept differently in their models and they’ve also given different names, so there’s no convention for naming the same kind of design. What is a bit misleading to consumers.
If in the All Round / All Mountain category the preferred terrain had it’s influence, in the Fats it’s even more important. This only factor can make the difference between the right election or committing a big mistake. The same rules as before apply, but more intensely.
For someone that has just arrived into this particular view of skiing, it does not make a lot of sense choosing the wider models. Therefore, we’d better take a look to the low-fat and mid-fat range. The snow’s quantity and quality, as well as the kind of terrain we usually face, will be a decisive factor when choosing between the two. As a rule of thumb, we can say the more and better snow you may find the wider you should go. The less and poorer snow quality found the skinnier you may go.
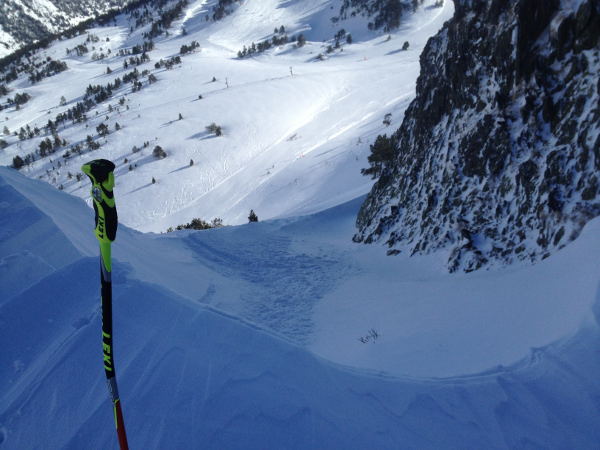
Difficult terrain. Photo courtesy of Xavier Albero.
© Xavier Albero
On the side of those who are quite used to the “wild” scenario, the mid-fat and fat ones will be the target. However, we must be attentive and remember that if snow conditions are difficult and if the white element is also a bit scarce choosing a low-fat profile is a very recommendable option for you too. We should not be defeated by our will of deep powder and epic, unforgettable rides when deciding. Keep calm.
The most common mistake when choosing off-piste skis is buying a too short pair. In the chapter where size is tackled, we will see more about this. But as a rule of thumb, except in very specific cases, we can state that it is not recommendable choosing skis as tall as we are. To hit it somewhat right we should go for skis at least 5cm taller than us. That is the minimum size of reference and where beginners will feel comfortable. For those who have already had some contact, 10cm+ won’t be a problem, they will enjoy their gear. The ones who feel at home in deep and steep terrain, choosing around the 15cm+ is not only the norm, it is even mandatory. All that said, we must take in account the Rocker technology. If our ski incorporates a quite generous rocker, the elected size should go even further in length.
Another subject that has lately gained some relevance and has come with some heated discussions too, is the camber. It was quite an unheard term. But since the Rocker’s irruption along with these new models which in turn have smashed classic designs, it has become mainstream. The use of distinct nomenclature formulas has not helped at all to the general public either. But fortunately, step by step, manufacturers and practicioners are establishing a more fluent, clear and understandable dialogue.
If we take a look at classic designs, the camber is positive. The camber is the “natural” arch form you can see in a ski. If you leave it with the sole on a flat surface, you will see the tip and the tail touching the surface below, but the waist won’t. This design is named “Traditional” or “Full Camber”.
Now let’s have a look at the opposite side, the “Rocker” skis. The more radical models are those with negative camber or so called “Reverse Camber”. They also get the “Full Camber” name. (Can you see the naming convention problem now?). The ski is bent along a quite large part of its length and both tip and tail raise from the floor when this is flat. It is worth mentioning they are not bent forming a clean arch. They also have a flat area in the center covering at least a quarter of the total length. The same area, not necessarily in distance, as a traditional camber would cover in a classic design. These pure rocker models work very well in deep powder, but this is not the case on the groomed terrain where they feel out place and less capable. They are designed and focused to some specific conditions and they need a big amount of powder snow to work properly.

The K2 Annex 118 is a good example of a modern Fat ski. It’s got it all.
© K2 Sports
There are also some models combining both design paradigms, hoping to gather up the best of both worlds without compromising the end result. Some of them only have their tips bent upwards and this is called “Tip Rocker” as well as “Early Rise”. The rest of the ski has a traditional positive camber design. Some other models go one step beyond and combine the raised up tip and tails with a traditional positive camber. They didn’t scratch their heads a lot when naming this design, which is called “Tip and Tail Rocker”. Those are skis that don’t see their behavior harmed because of a flat/negative camber in the center and they feel more maneuverable on the piste, giving a higher sensation of control, which is the reason why they are perceived safer and more stable than the pure rockers. At the same time they are good skis for off-piste terrain when taking powerful angles which is the benefit of the “reverse” camber shape in their tip and tail. Depending on the model, the end result would feel noticeably different as for the area affected by the rocker raise in relation to the classic camber area. The less rocker the more classic behavior.
Another very important factor to have in mind with this kind of skis are the bindings. Which to use, where to install them, how to, etc. What’s been done for ages is to install the bindings directly on to the ski. No plate, nothing in between the ski and the binding. And we should account on the fact that the ski won’t bend where we have our feet upon. This obviously will affect the flex capacity of the ski, specially when finding hard packed snow. Therefore the ski is not working correctly.
Many will argue that installing a plate would raise the distance between the sole of the ski and the boot’s sole. This means that, with a smaller lateral movement, we could engage the edge more easily. Such effect could be little desired, specially on a combination of quite short radius skis and some particular circumstances, where that could lead to an undesired nailing, trapping our feet in the snow.
Another idea to keep an eye on when mounting the binding directly on the ski is that it can considerably reduce their effectiveness and throw away all DIN specifications as well as the engineering work. Work that does not stop in the bindings. In fact if we look into detail of why the rocker, it clearly shows how preposterous is to not utilize (that is, betray) all these efforts in new designs and new constructions when 50cm at least are left uncompromisingly flat because of installing the binding without any interface. Specially on those models where a combination of classic and new design is taken.
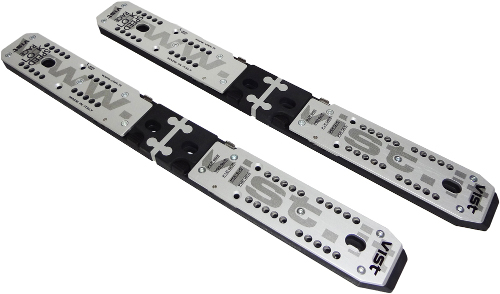
A Vist Speedlock Pro Plate
© Vist
Because of these three important reasons, it is not out of the scope looking for a light plate which will let that back and forth adjustment to the boot-binding pair. There are distinct models with different thickness and forms to choose in between. And last but not least, don’t be confused and choose a raise plate. What is desired is a plate that serves as an interface between the boot-binding system and the ski allowing it to bend freely while letting the binding work at full performance, correcting its position as necessary. We will distinguish these plates from others because they have small rails in the front and rear. Along them, small screws slide allowing the binding to move back and forth absorbing the flex of the ski while retaining their safety system capacity. Some other screws are mounted in a fix position nailing the plate interface to the ski. And just a few of them mount the binding on top of the plate.
Another good option chosen by many users of this kind of skis and catching up as manufacturers are focusing and improving the materials, consists in mounting specific freeride bindings. Those bindings allow a free heel that in combination with special skins letting the skier to climb up the hill gaining a wider access to the mountain, while providing good performance (On Piste-like) in the downhill. To purists mountain skiers many of these bindings result too heavy and inadequate for their use because they are more focused in a ski-mountaineering paradigm. But for those who are focused in the downhill skiing, the freeride bindings are just the way to go.
SkiReviewer’s Buying Skis Guide
1.- Sailing the Ski’s Gear Ocean – An introduction to variety
2.- To Buy Skis or To Rent Skis? – How worth is to own your skiing gear
3.- All Types of Skis Quick Guide
4.- Types of Skis – Explained one by one
6.- The Skier’s Height and Weight – And some other important considerations
8.- The Ski Size Chart explained – Tips and ideas for choosing the right ski at first sight
© SkiReviewer – All rights reserved